This blog post discusses improvements in phase shifting algorithms for increased accuracy.
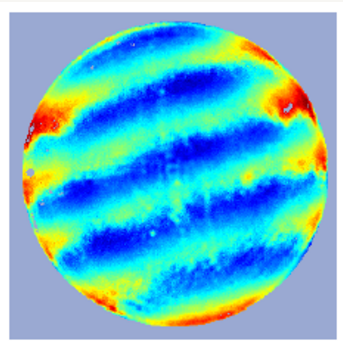
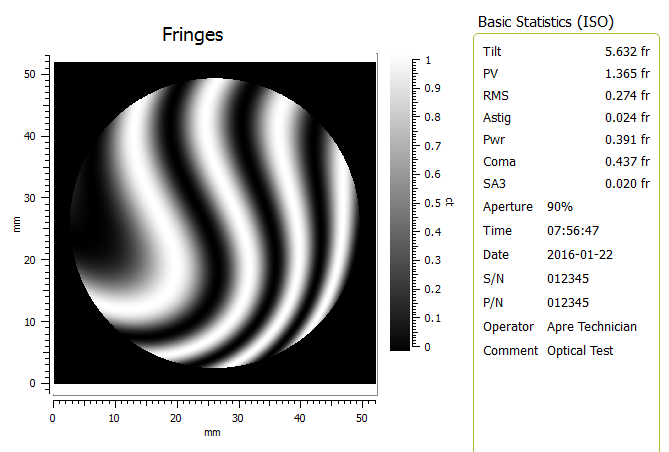
From the earliest days of phase shifting interferometry (PSI) phase ripple has been a problem. Ripple in the phase data follows the live fringe pattern but with twice the fringe frequency (ripple with the same frequency as the fringes can also appear and will be discuss at the end of the article). Ripple is an increase in measurement uncertainty (lower accuracy) and thus needs to be minimized. Further ripple can mimic mid-spatial frequency errors confusing the control feedback when spot polishing. Thus its minimization is important to good quality control.
Correcting Phase Ripple
In the late 1970’s Phase Ripple was called the “ripple bug” and its origin was unknown. The primary source was found to be vibration in the interferometer cavity during the data acquisition, and later other sources were identified such as nonlinearities in cameras and the phase shifting mechanisms. Any deviation from equally spaced phase shifts during acquisition or non-linearities that distorted the shape of the fringes cause ripple to form. Cameras became more linear with the advent of the then new CCD’s, and control of phase shifting mechanics improved, yet vibration is always present.
Nulling the Fizeau Cavity to Minimize
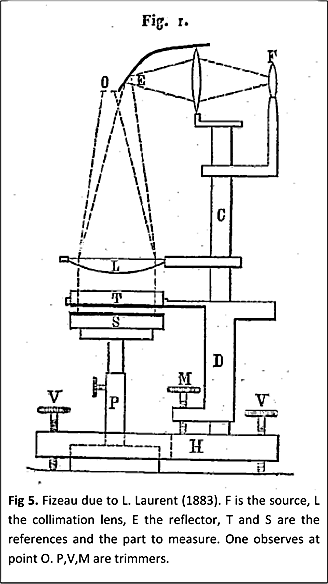
The first technique to minimize ripple was simply to null the cavity. By minimizing the visible fringes, the ripple is spread across the data. If perfectly nulled the ripple is insignificant when the test surface is a perfect sphere. This is still good practice as a nulled cavity exhibits the least errors in a Fizeau interferometer. Yet it is not always possible to null the fringes and so ultimately a better approach was needed.
Improved Phase Shifting Algorithms
In the early 1980’s the standard phase algorithm was four camera frames (buckets) spaced by 90°. Jim Wyant pointed out that only three frames were required to find phase, but this algorithm is particularly vibration sensitive. Four frame PSI, initiated by John Bruning’s group1, was less sensitive and in the late 1980’s Hariharan2 introduced a five frame PSI algorithm that was better than both. In 1988 Kathy Creath3 investigated numerous algorithms with varying sensitivity to ripple and in 1997 Peter Degroot4 wrote a “definitive” paper on phase shifting algorithms. These approaches made PSI less sensitive to phase shift spacing and the jitter between phase frames, but did not directly address the unequally spaced fringes due to vibration.
New Approach: Post Acquisition Correction

In 1982 Morgan5 investigated applying a post acquisition least squares correction to PSI. In the 1990’s a parallel line of investigation became active. This approach corrects the acquired data to the expected phase shifts through mathematical optimization. I.Kong and S. Kim 6,7 created a least squares PSI algorithm and an algorithm to “automatically suppress phase shift errors”, followed by C.Wei, M. Chen, & Z. Wang 8 with a “General Algorithm for phase-shifting interferometry by iterative least squares fitting”. Over the next 10 years a flurry of work 9,10,11,12,13,14,15 developed algorithms immune to translational and in some cases tilt shift error using iterative optimization. These works established the methodologies for vibration tolerant algorithms and demonstrated that with fast computers phase shifting errors could be minimized algorithmically, and practically.
Commercially Available Today
Vibration tolerant PSI, based on 35 years of development, are now commercially available as found in ÄPRE’s “Universal Phase Algorithm”6 in REVEAL™. The universal phase algorithm effectively minimizes phase ripple, as long as the vibration does not exceed ~150 nm P-V (λ/2 fringe). If the vibration exceeds 150 nm P-V then phase shifting interferometry breaks down and simultaneous PSI (Multi-Camera or Carrier Fringe) is required.
Vibration is not the only source of phase ripple
Intensity Variations
When phase ripple appears at the same frequency as the fringes illumination intensity variation during measurement is a likely cause. This can occur due to a laser or light level control failing. Interestingly, in interferometers equipped with rotating diffusers, variations in light level may occur due to differences of transmissivity in different areas of the diffuser rotating disk or simply by dirt on the diffuser disk.
Fringe Contrast Variations
Fringe contrast (modulation) is generally defined by the coherency of the source and is usually quite stable. However a laser can exhibit variations when the source is not properly stabilized. Also laser instability can be caused by mechanical vibrations when combined with long exposure times (usually longer then 10 ms.). In the later case the moving fringes will “average out” over a small area causing a loss of modulation that may be different for each recorded fringe image. The combination will create phase ripple in the data.
Tilt Variations
Vibration is considered a “piston” term – equal for every pixel across the aperture. If the phase shifting mechanics do not move straight the phase shifts will vary across the aperture, causing uncorrected ripple even with a correction algorithm. Recent work9,14 has attempted to address this error. This tilt induced ripple can also occur if the test or reference is not rigidly mounted.
Test or Reference with High Reflectivity
When one of the test parts has a high reflectivity fringes are detected that have reflected several times within the cavity. These multiple reflections distort the fringe shape. PSI algorithms, including vibration tolerant algorithms expect sinusoidal fringes. The distorted fringes are non-sinusoidal and induce phase ripple. To suppress the multiple reflections special coatings are applied to the reference or a thin pellicle is placed between the test and reference to suppress the multiple reflections.
References:
- J. H. Bruning, D. R. Herriott, J. E. Gallagher, D. P. Rosenfeld, A. D. White, and D. J. Brangaccio, “Digital Wavefront Measuring Interferometer for Testing Optical Surfaces and Lenses”, Appl. Opt. 13, 11, 2693-2703 (1974)
- P. Hariharan, B. F. Oreb, and T. Eiju, “Digital phase-shifting interferometry: a simple error-compensating phase calculation algorithm”, Appl. Opt. 26, 13 2504 – 2506 (1987)
- K. Creath, “Phase-shifting interferometry techniques,” Progress in Optics, E. Wolf, ed. (Elsevier, 1988), Vol. 26, 349-393
- P.Degroot, “101-frame algorithm for phase shifting interferometry”, Europto 1997, Preprint 3098-33
- C.J.Morgan, “Least-squares estimation in phase-measurement interferometry”, Opt. Lett. 7, 368-370 (1982)
- I.B.Kong & S.W.Kim, “General Algorithm for phase-shifting interferometry by iterative least squares fitting”, Opt. Eng. 34, 183-187 (1995)
- I.B.Kong & S.W.Kim, “Portable inspection of precision surface by phase-shifting interferometry with automatic suppression of phase shift errors”, Opt. Eng. 34, 1400-1404 (1995)
- C.Wei, M. Chen, & Z. Wang, “General phase-stepping algorithm with automatic calibration of phase steps,” Opt. Eng. 38, 1357-1360 (1999)
- Chen, Guo and Wei, “Algorithm immune to tilt phase-shift error for phase-shifting interferometers”, Appl. Opt, 39, 22, 3894 – 3898 (2000)
- K.G.Larkin & B.F.Oreb, “Design and assessment of symmetrical phase-shifting algorithms”, J. Opt.Soc.AM. A 9, 1740-1748 (1992)
- K.G.Larkin, “A self-calibrating phase-shifting algorithm based on natural demodulation of two-dimensional fringe patterns”, Opt. Expr.9, 236-253 (2001)
- H.Guo & Z.Zhang, “Phase shift estimation from variances of fringe pattern differences”, Appl. Opt. 52, 26, 65726578 (2013)
- Y-C Chen, P-C Lin, C-M Lee, & C-W Liang, “Iterative phase-shifting algorithm immune to random phase shifts and tilt”, Appl. Opt. 52, 14, 3381-3386 (2013)
- M.Wielgus, Z. Sunderland, K. Patorski “Two-frame tilt-shift error estimation and phase demodulation algorithm”, Opt. Letters 40, 3460-3463, August 1 2015
- L. Deck, “Model-based phase shifting interferometry”, Appl. Opt. 53, 4628-4636, July 2014
- P. Szwaykowski, “Minimization of vibration induced errors using a geometrical approach to phase shifting interferometry”, ASPE Summer Conference on Interferometry, July 2015


