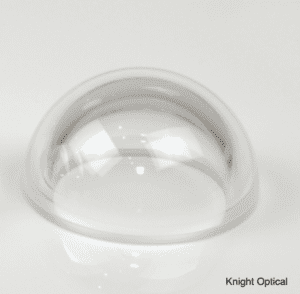
Optical domes are an important component in environmentally challenging imaging environments. Accurate metrology is required to achieve good imaging system performance.
Applications of Dome Optics

Dome optics are the last component in a growing number of imaging and guidance applications. Domes protect the imaging optics from the surrounding environment without degrading optical performance. Therefore the dome’s transmitted wavefront quality is important to control as it directly influences the final image quality. Dome applications include:
- Underwater Camera
- Submersibles for robotic and manned exploration
- Unmanned aerial vehicle
- Remotely Piloted Vehicle
- Space applications
- Missile Guidance System
- Security systems
Manufacturing Parameters to Control
Transmitted wavefront is degraded by several parameters which must be controlled during manufacture:
- Individual surface irregularity
- Front-to-back surface thickness variation (TTV)
- Front-to-back surface decenter (X-Y)
- Center of radii shift in Z
- Transmitted wavefront
Typical Metrology Methods
Laser Fizeau Interferometer
A laser Fizeau interferometer appears as an obvious choice to measure domes. Transmitted wavefront and surface irregularity are typical parameters measured with a Fizeau interferometer. The long coherence of the laser Fizeau frustrates these measurements as both surfaces mutually interfere with the reference sphere as well as the front and back surfaces creating three interference patterns overlaid making accurate surface measurement impossible. [Optically a dome is equivalent to a flat parallel plate and encounter the same measurement difficulties] Tilt can be introduced in an attempt to visually separate the surfaces, or one surface is painted black to lower the fringe contrast from that surface, but in the end the measurements are not reliable.
5-Axis CMM with Point Probe or Depth Probe
5-Axis Coordinate Measuring Machines (CMM) swings a probe

The measurement reference or metrology frame is created by controlling the CMM’s motions. Motion control of a point in space (the probe) is technically difficult especially with 5 non-orthogonal axes are concerned. Therefore the measurement accuracy is degraded compared to a Fizeau interferometer that has a fixed reference (metrology frame).
The 5-Axis CMM is slow to measure (minutes to hours depending on the resolution of data to acquire), typically expensive if state-of-the-art measurement uncertainty is achieved (~$750,000 [ USD]) and even then they do not approach optical metrology accuracy required.
SCI Fizeau: Fixed Metrology Frame all Parameters Measured
The Fizeau configuration is optimal considering accuracy. With ÄPRE’s Spectrally Controlled Interferometry (SCI) the coherence is controlled enabling the measurement of all parameters.

Just like for a plane parallel plate the SCI coherence can be adjusted to create fringes on each surface individually and between the front and back surfaces. In this way an accurate, fast method exists to measure all dome parameters. The following interference cavities provide the required results:
- Surface Irregularity 1: Fizeau Sphere Reference to Surface 1 (PVr & RMS: Tilt & Power removed)
- Surface Irregularity 2: Fizeau Sphere Reference to Surface 2 (PVr & RMS: Tilt & Power removed)
- TTV: Surface 1 to 2 (PVr result)
- Decenter (X & Y): Surface 1 to 2 (Tilt result)
- Center of radii shift in Z: Surface 1 to 2 (Power result)
- Transmitted Wavefront: Fizeau Sphere Reference to Additional Reference Sphere (PVr & RMS: Tilt & Power removed)

The region of measurement is determined by the Fizeau sphere f#. A faster (lower number) sphere the more coverage. To cover a full hemisphere an f# of 0.5 is required and these do not exist. Tilting the sphere to the edges enables coverage of the full hemisphere over a series of measurements.
Summary
Domes are an important element in imaging systems used in environmentally challenging environments. ÄPRE’s SCI technology provides rapid and accurate measurements of all parameters in one setup.