Material Homogeneity
Optical index homogeneity is an important material parameter influencing lens performance. Laser interferometers have painstakingly measured this parameter which requires four separate measurements. Laser interferometers have either required the use of contact plates with oft times poisonous index matching fluids. Or polishing a wedge into the test part to isolate the front from the back surface. In both cases the test part must be repeatedly tilted to isolate from test parts front and back surfaces as shown in figure 1. Tilting lowers the measurement accuracy as the test beams do not return over themselves (common path operation is lost), makes the test more complicated, and slows the measurement down exposing the test part to thermal variations increasing measurement uncertainty.

Laser Wavelength Scanning Fourier Interferometer
Recently laser wavelength scanning Fourier (LWSF) interferometry has been used for homogeneity measurements. LWSF enables the test part to be plane parallel polished and set up where no tilting during the measurement sequence is required. Once set up two measurement sets are required, one with the test part and one without. LWSF takes up to a minute to measure the cavity, therefore it exposes the measurement to environmental changes, limiting repeatability and accuracy. Plus vibration tolerant phase algorithms are not applicable.
LWSF Surface Confusion
Plus there can be confusion as to what surfaces are measured since the Fourier algorithm “finds” the six sets of fringes present in the cavity of which only four are of interest.
SCI Simplifies Homogeneity Measurements for Improved Accuracy
SCI, similar to LWSF, uses a plane parallel polished test part to measure homogeneity. Therefore the test part is easy to manufacture. In the laser alignment mode SCI enables easy alignment of the four surfaces. Starting with the empty cavity nulled alignment, then adding the test part and minimizing fringes to complete alignment.
With SCI only the cavity to be measured is seen, there is no confusion. After setting up, switch to the short coherence, white light, mode:
- Select the transmission flat (TF) to test part S1. Measure with vibration tolerant (VT) PSI in < 1 second.
- Then electronically select TF to S2 and measure with VTPSI.
- Now select the TF to RF cavity – through the test part – measure.
- Finally remove the test part and measure the TF to RF cavity.
REVEAL homogeneity application leads the user through these sets, see figure 2.

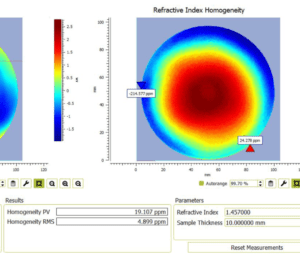
Once the four measurements are complete the homogeneity result computed automatically, see figure 3.

See the link below for a ÄPRE technical paper regarding the computing the uncertainty of measurement of homogeneity measurements.
Summary
Homogeneity is an important performance parameter for optical materials. Spectrally Controlled Interferometry (SCI) simplifies the measurement, improves accuracy and ÄPRE REVEAL software leads the user step by step through the process.
Homogeneity Measurement Uncertainty Technical Paper >