In this blog we explore the camera array size required to accurately measure Zernike polynomials in a laser Fizeau interferometer, and thus determine when a zoom system is important. (Hint: Zoom is a historical artifact)
Is a Zoom System Required?
Recently we were asked to provide a system with 4X zoom imaging to accommodate a 25 mm part in a 100 mm system. The thinking being to accurately measure a small part a zoom system is required. It is important to first understand what is the measurand, the quantity measured. In this case the customer wanted to measure and correct alignment errors as indicated by Zernike polynomial terms.
A zoom system adds complexity and cost, plus it can make calibrating the aperture size (pixel size) more complicated. A zoom also matches the image size to the camera, maximizing the pixel count active in a measurement. This raised the question, “How important is pixel count for measuring 36 Zernike terms accurately?” In this case accurate meant up to λ/10 P-V.
Camera Array Size Simulation
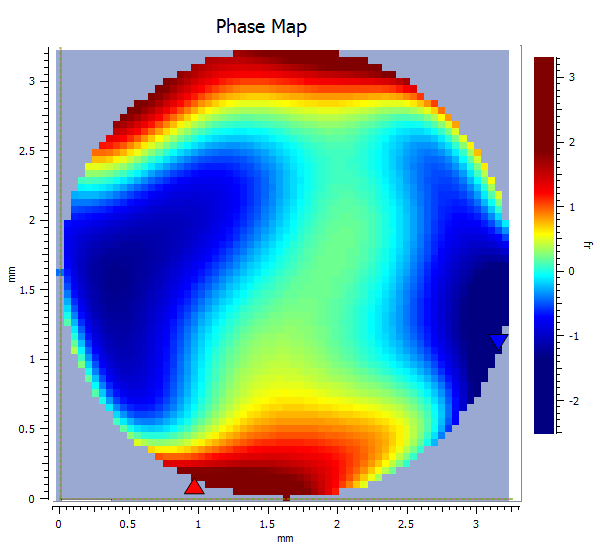
Using ÄPRE’s REVEAL software we simulated a measurement by building an artificial surface in the Zernike surface generator. The generator can be set for any pixel array size. Three pixel array sizes were simulated: 512 X 512 (1X zoom), 128 X 128 (4X zoom), and 64 X 64 (8X zoom). See figure 1 for examples of the 64 X 64 and 512 x 512 array data.

The input values of the 36 Zernike coefficients were compared to the calculated results for the three array sizes. These differences indicate the measurement uncertainty simply due to array size influences on the calculation of the Zernike polynomials.
As can be seen in figure 2 the 64 X 64 array deviated up to 0.08 fringe (0.04 wave = λ/25). The 256 X 256 and 512 X 512 never induced errors no greater than 0.006 fringe! Indicating arrays larger than 128 x 128 have no influence on the results.

Aperture Converter
To measure a part smaller than 25% of the aperture add an aperture converter to decrease the output aperture to match the smaller part. Caution: Adding an aperture converter can make the interferometer more sensitive to retrace errors in high slope measurements
Why Zooms?
Zoom systems were introduced in the late 1970’s when vidicon cameras were 64 X 64 or at best 128 X 128 effective array resolution. Beyond 2X zoom the Zernike terms started to fail and thus a zoom was needed. Continuous zoom systems were commercially available at 6X and thus 6X became the standard. After 35 years of use it is easy to assume a zoom imaging system is needed.
Conclusions
A zoom system (up to 8X zoom) is not required to “fill the camera array” to achieve results accurate to λ/25 when measuring up to 36 Zernike polynomial terms. The best configuration in this case is a fixed magnification system, optimized for the camera array to pass the maximum spatial frequencies.


